zamackie49
Just got it firing!
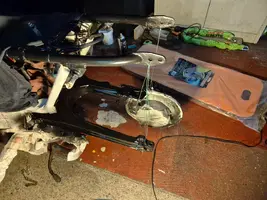
I am now the proud owner of GeoffStovold's V65. I decided to give it a light restoration. Details to follow, as and when.


Follow along with the video below to see how to install our site as a web app on your home screen.
Note: This feature may not be available in some browsers.
.webp")


Thanks for that. I don't have a manual for the V65 only one for the V50, which I assume is similar in many respects, but you know what they say about assumptions.It's all per manual.....just drain (& measure how much comes out in case you don't disassemble the damper units) the drain bolt & then undo the 'underneath big bolt' & withdraw the fork lower....seal is a circlip then screwdriver/suitable puller. Just drift new seal in & replace circlip (it's not pressurised, just holds the ATF in the fork). Carefully refit fork leg making sure the spring end cap groove aligns with lower cap thing in lower leg (some are plastic, some metal) refit lower 'underneath bolt'...refill from top with same amount you took out (or refill with recommended if you stripped it all down). Assuming you have manual, it's straightforward & only thing I remember is that 'forks back tightenend in yolks' is the best way to hold stanctions/fork (incl wheel sometimes) to undo/retorque lower bolt and top bolt.
 For example, are the forks the same size? Anyway, things are progressing slowly with the hope that the bike will be ridable in the spring.
I couldn't see how to watch your video. Do I need a special player?Here's my rebuilt short video in case it helps....V65 Florida refurb; 1drv.ms/v/s!AtciqvJAt-nzsm1YQf-q9OCy5vQV?e=ceJYTf

.webp")
.webp")

.webp")


 but I hope that it will be ready for April and some reasonable biking weather. We plod on. More news to follow.


.webp")
.webp")