1200 Sport Fork Servicing
My left fork seal was leaking (known OE problem) when I bought the bike in September 2012 with 2500 miles on it. Still leaking (no surprise) at 6000 miles, I decided to upgrade the springs while I had both forks apart to replace the seals.
Summary of what I serviced / replaced:
• New fork oil, 10W Matrix Race Fork Fluid, 150 VI
• Replaced both forks’ seals and sweepers with OE Marzocchi from GT
• New straight-rate springs (0.95 kg/mm) and PVC spacers from GT
Special tools / supplies needed; I have a decent selection of suburban mechanic tools and bought a few new items:
• 27mm socket for fork caps
• 30mm socket for front wheel axle nut
• 7mm hex / Allen key socket for brake caliper and fork retaining bolts
• 45mm seal driver, 45mm seal bullet to protect seals when installing
I followed the 1200 Sport service manual which incorrectly shows the process for Breva 1100 damping rod forks. The 12S has cartridge forks – the main difference (aside from operation) is that the fork caps are screwed onto the damping rod, changing the order of disassembly / assembly.
Steps:
1. Remove forks from triple clamps per service manual. (Fender, calipers, wheel, pinch bolts, etc. are all as described in the manual.)
7mm Allen key socket (notice the buildup of leaking fork oil around the caliper)

2. Back off rebound and compression adjuster screws full out (counter-clockwise).
3. Loosen fork cap from slider tube using 27mm socket. I clamped the slider tube in a small vise with rubber jaw covers and also held the slider tube by hand with some non-slip rubber to keep it from rotating while my helper turned the ratchet. This was one of the most challenging steps since you can’t clamp the slider tube with too much force (and I was using a wimpy little bench vise better suited to indoor hobbies). The spring and damping rod will spin with no issue, and the damping rod will remain screwed to the fork cap. There is a little bit of tension on the fork cap so keep some downward pressure on it as you loosen it.
4. Tip the fork over and drain the old fluid from the top of the fork tube. I did not measure the old fluid but I recommend that you do (it should be a little less than 500mm). This gives you a benchmark for the amount of new fluid.
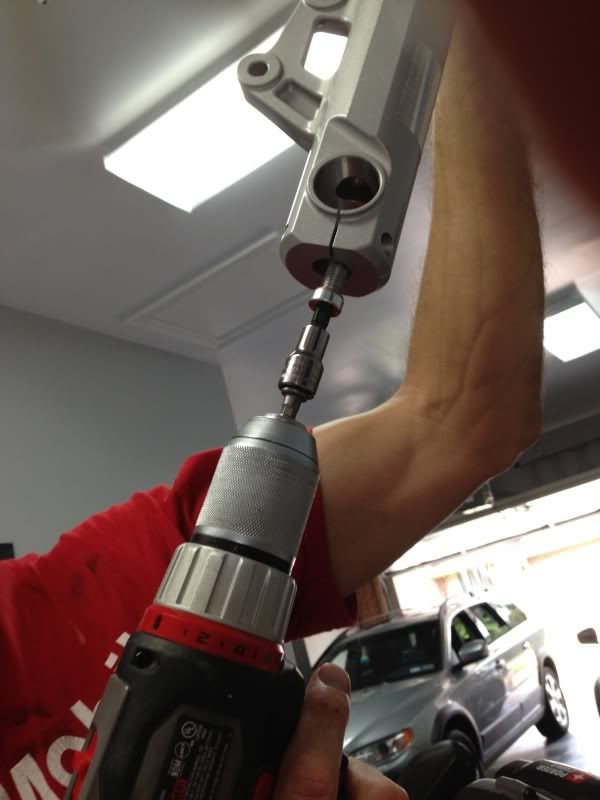
5. Remove the bottom fork retaining bolt. I used an 18V drill with a 3/8” driver and a 7mm hex key socket. I set the drill on “high speed” for drilling (vs. low speed for driving screws) and the bolt came right out. Instead of clamping the lower fork tube in my wimpy vise, I laid the fork on a rubber door mat on a cement step outside my garage door and stood on it to keep it from rotating while I extracted the bolt. No issues.
6. Remove the fork cap / spring / cartridge assembly from the slider tube.
7. Insert the 19mm wrench found in the OEM toolkit between the spring coils and remove the fork cap with the 27mm socket. (The OEM wrench is thin enough to fit between the spring coils.) Put some downward pressure on the fork cap as it loosens to keep it from popping off or deforming any threads. The cap is not under much pressure from the spring but just be aware of this.
8. Remove the old spring and spacer from cartridge assembly, slider tube, sweeper, retaining spring, and seal as per the service manual. My Teflon bushings were a little worn but nothing that needed replacement. I cleaned everything with brake cleaner and let it dry before reassembly – not necessary but my fork oil was pretty dirty.
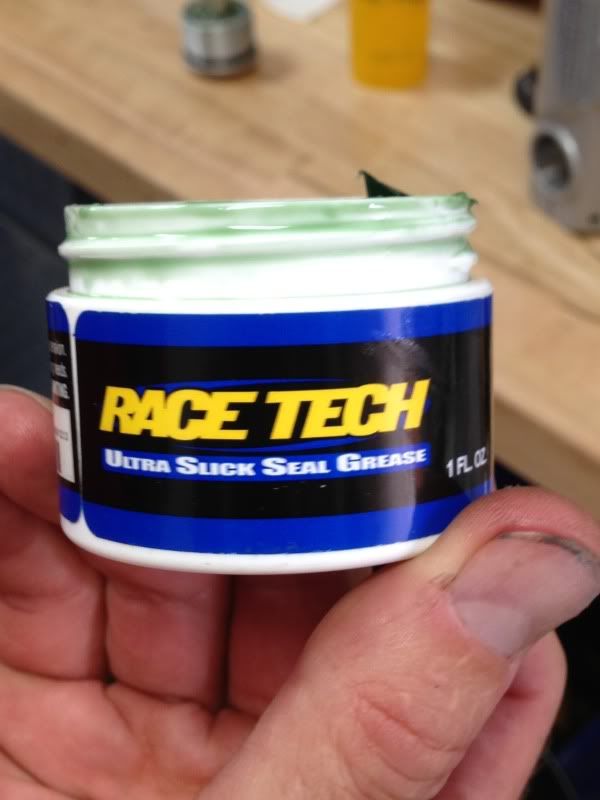
9. Re-install slider tube then use the seal bullet and seal driver to seat the seal. I used lots of seal grease (Race Tech brand) on the bushings, seal, and sweeper to ensure that nothing bound up during assembly.
10. Re-install the cartridge assembly and use the drill driver to install the retaining bolt.
11. I tied a piece of string about two feet long under the nut on the end of the damping rod then threaded the new PVC spacer and spring onto the rod; I used the string to extend the rod and nut as far as possible.
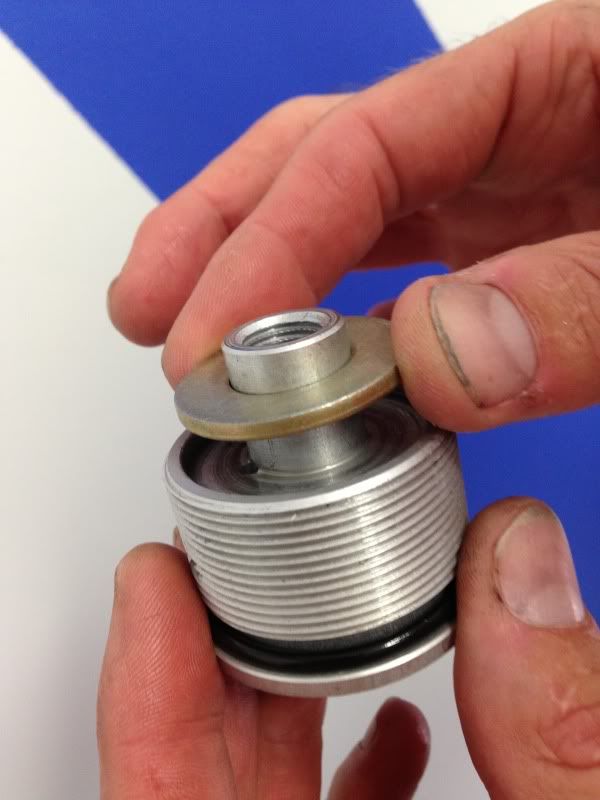
12. I added a brass washer under the fork cap since the new springs were not tapered like the originals. The washer gives the spring a larger seating surface because there is a ridge on the fork cap the tapered originals sat in.
13. To compress the spring, I used two screwdrivers across the coils to push the spring down while my helper pulled the damping rod up with the string, all while keeping the bottom of the forks stable with her feet and braced against the garage floor. The spring rate is not that great and we were able to get the fork cap threaded onto the end of the damping rod quite easily. Using the 19mm OE wrench again, tighten the fork cap onto the damping rod with the 27mm socket.
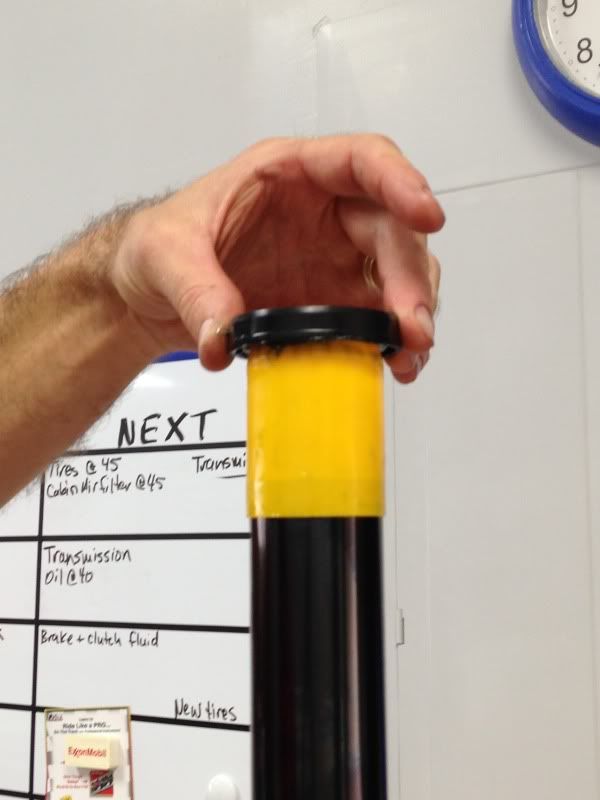
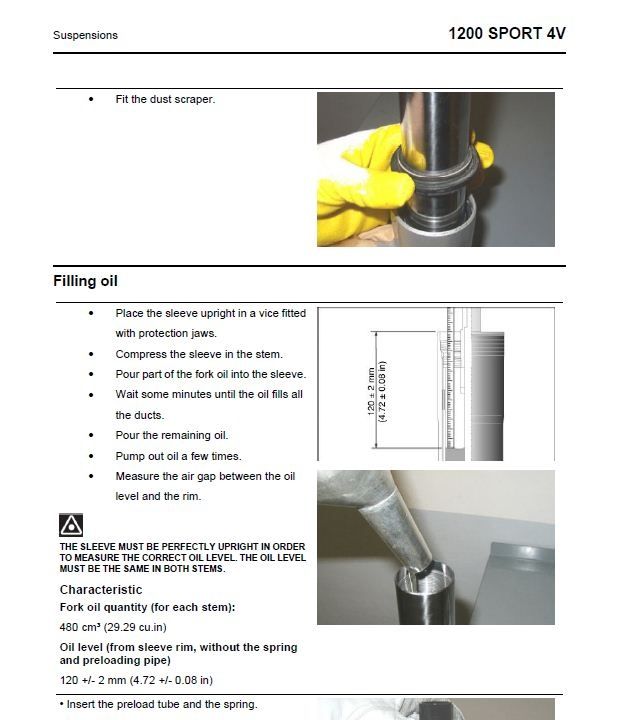
14. Measure out 480cc of fork oil and pour it into the fork tube. I compressed the fork a few times to get the oil into the passages and also let it sit upright for a while for any air to rise to the top.
15. Screw the fork cap back onto the fork tube with the 27mm socket and tighten – I used the non-slip rubber to keep the slider tube from turning too much like during disassembly.
16. Reinstall the forks into the triple clamps per the service manual.
I am willing to tackle almost any new job and was a little hesitant to tear into forks for the first time, but based on the simplicity once I saw the insides, I think that seals, oil, and springs are well within the capabilities of most DIYs. (For reference, Uncle Sam trained me as a mechanic on F-16s many years ago and at home, I do brakes, transmission fluid, brake lines, head gaskets on a Chevy V8, rejetted the carb on a dirt bike, and other routine car maintenance. I do not own any air tools, don’t have a bike lift, and have to fit my wrenching in between my daughter’s swim practice and walking the dog.)
I’m happy to answer any questions since I did not take as many pictures as I should have. I am also willing to loan some of the specialty items (seal driver, bullet, etc.).
Early indications are great on the higher spring rate and I continue to play with the compression and rebound adjusters. And, the seal is not leaking anymore!
HTH,
Tom
My left fork seal was leaking (known OE problem) when I bought the bike in September 2012 with 2500 miles on it. Still leaking (no surprise) at 6000 miles, I decided to upgrade the springs while I had both forks apart to replace the seals.
Summary of what I serviced / replaced:
• New fork oil, 10W Matrix Race Fork Fluid, 150 VI
• Replaced both forks’ seals and sweepers with OE Marzocchi from GT
• New straight-rate springs (0.95 kg/mm) and PVC spacers from GT
Special tools / supplies needed; I have a decent selection of suburban mechanic tools and bought a few new items:
• 27mm socket for fork caps
• 30mm socket for front wheel axle nut
• 7mm hex / Allen key socket for brake caliper and fork retaining bolts
• 45mm seal driver, 45mm seal bullet to protect seals when installing
I followed the 1200 Sport service manual which incorrectly shows the process for Breva 1100 damping rod forks. The 12S has cartridge forks – the main difference (aside from operation) is that the fork caps are screwed onto the damping rod, changing the order of disassembly / assembly.
Steps:
1. Remove forks from triple clamps per service manual. (Fender, calipers, wheel, pinch bolts, etc. are all as described in the manual.)
7mm Allen key socket (notice the buildup of leaking fork oil around the caliper)

2. Back off rebound and compression adjuster screws full out (counter-clockwise).
3. Loosen fork cap from slider tube using 27mm socket. I clamped the slider tube in a small vise with rubber jaw covers and also held the slider tube by hand with some non-slip rubber to keep it from rotating while my helper turned the ratchet. This was one of the most challenging steps since you can’t clamp the slider tube with too much force (and I was using a wimpy little bench vise better suited to indoor hobbies). The spring and damping rod will spin with no issue, and the damping rod will remain screwed to the fork cap. There is a little bit of tension on the fork cap so keep some downward pressure on it as you loosen it.
4. Tip the fork over and drain the old fluid from the top of the fork tube. I did not measure the old fluid but I recommend that you do (it should be a little less than 500mm). This gives you a benchmark for the amount of new fluid.
5. Remove the bottom fork retaining bolt. I used an 18V drill with a 3/8” driver and a 7mm hex key socket. I set the drill on “high speed” for drilling (vs. low speed for driving screws) and the bolt came right out. Instead of clamping the lower fork tube in my wimpy vise, I laid the fork on a rubber door mat on a cement step outside my garage door and stood on it to keep it from rotating while I extracted the bolt. No issues.

6. Remove the fork cap / spring / cartridge assembly from the slider tube.
7. Insert the 19mm wrench found in the OEM toolkit between the spring coils and remove the fork cap with the 27mm socket. (The OEM wrench is thin enough to fit between the spring coils.) Put some downward pressure on the fork cap as it loosens to keep it from popping off or deforming any threads. The cap is not under much pressure from the spring but just be aware of this.
8. Remove the old spring and spacer from cartridge assembly, slider tube, sweeper, retaining spring, and seal as per the service manual. My Teflon bushings were a little worn but nothing that needed replacement. I cleaned everything with brake cleaner and let it dry before reassembly – not necessary but my fork oil was pretty dirty.
9. Re-install slider tube then use the seal bullet and seal driver to seat the seal. I used lots of seal grease (Race Tech brand) on the bushings, seal, and sweeper to ensure that nothing bound up during assembly.


10. Re-install the cartridge assembly and use the drill driver to install the retaining bolt.
11. I tied a piece of string about two feet long under the nut on the end of the damping rod then threaded the new PVC spacer and spring onto the rod; I used the string to extend the rod and nut as far as possible.
12. I added a brass washer under the fork cap since the new springs were not tapered like the originals. The washer gives the spring a larger seating surface because there is a ridge on the fork cap the tapered originals sat in.

13. To compress the spring, I used two screwdrivers across the coils to push the spring down while my helper pulled the damping rod up with the string, all while keeping the bottom of the forks stable with her feet and braced against the garage floor. The spring rate is not that great and we were able to get the fork cap threaded onto the end of the damping rod quite easily. Using the 19mm OE wrench again, tighten the fork cap onto the damping rod with the 27mm socket.
14. Measure out 480cc of fork oil and pour it into the fork tube. I compressed the fork a few times to get the oil into the passages and also let it sit upright for a while for any air to rise to the top.

15. Screw the fork cap back onto the fork tube with the 27mm socket and tighten – I used the non-slip rubber to keep the slider tube from turning too much like during disassembly.
16. Reinstall the forks into the triple clamps per the service manual.
I am willing to tackle almost any new job and was a little hesitant to tear into forks for the first time, but based on the simplicity once I saw the insides, I think that seals, oil, and springs are well within the capabilities of most DIYs. (For reference, Uncle Sam trained me as a mechanic on F-16s many years ago and at home, I do brakes, transmission fluid, brake lines, head gaskets on a Chevy V8, rejetted the carb on a dirt bike, and other routine car maintenance. I do not own any air tools, don’t have a bike lift, and have to fit my wrenching in between my daughter’s swim practice and walking the dog.)
I’m happy to answer any questions since I did not take as many pictures as I should have. I am also willing to loan some of the specialty items (seal driver, bullet, etc.).
Early indications are great on the higher spring rate and I continue to play with the compression and rebound adjusters. And, the seal is not leaking anymore!
HTH,
Tom