• Ciao Guest - You’ve landed at the ultimate Guzzi site. NEW FORUM REGISTRATIONS REQUIRE EMAIL ACTIVATION - CHECK YOUR SPAM FOLDER - Use the CONTACT above if you need help. New to the forum? For all new members, we require ONE post in the Introductions section at the bottom, in order to post in most of the other sections. ALWAYS TRY A SEARCH BEFORE STARTING A NEW TOPIC - Most questions you may have, have likely been already answered. DON'T BE A DRIVE-BY POSTER: As a common courtesy, check back in and reply within 24 hours, or your post will be deleted. Note there's decades of heavily experienced Guzzi professionals on this site, all whom happily give endless amounts of their VALUABLE time for free; BE COURTEOUS AND RESPECTFUL!
  • Be sure to see the GTM STORE link also above for our 700+ product inventory, including OEM parts and many of our 100% Made-in-SoCal-USA GTM products and engine kits. In SoCal? Click the SERVICE tab above for the best in service, tires, tuning and installation of our products or custom work, and don't miss our GT MotoCycles® (not) art on the BUILDS tab above. WE'RE HERE ONLINE ONLY - NO PHONE CALLS MADE OR RECEIVED - DO NOT EMAIL AND ASK QUESTIONS OR ASK TO CALL YOU.
  • There is ZERO tolerance on personal attacks and ANY HYPERLINKS to PRODUCT(S) or other competing website(s), including personal pages, social media or other Forums. This ALSO INCLUDES ECU DIAGnostic software, questions and mapping. We work very hard to offer commercially supported products and to keep info relevant here. First offense is a note, second is a warning, third time will get you banned from the site. We don't have the time to chase repeat (and ignorant) offenders. This is NOT a social media platform; It's an ad-free, privately funded website, in small help with user donations. Be sure to see the GTM STORE link above; ALL product purchases help support the site, or you can upgrade your Forum profile or DONATE via the link above.

2022 V7 LeMans 850i - building it -

lemans850i

Cruisin' Guzzisti
GT di Razza Pura
Joined
Dec 5, 2022
Messages
491
Reaction score
520
Location
Claremont
I’m going to post pics here how my bike is evolving...
As this project is already for quite a few weeks at Todd’s shop for his R&D I want to thank him and his team for their graciousness and professionalism ! The best place to bring your bike to!!!!
 
I just noticed that I never took a pic of the bike after I bought it.. I rode it around the block and then destruction began....
But the pic below is what I used to look like.... normal blue (pretty) V7
7E6259B5-EECB-40CB-B37C-7D0B565BFEC8.webp
 
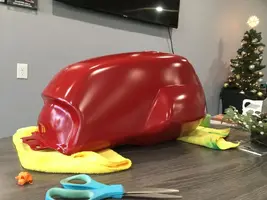
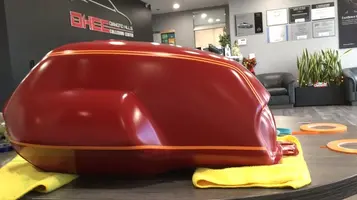
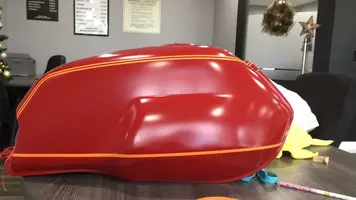
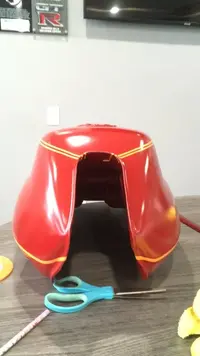
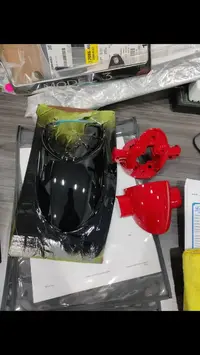
Getting my hands on all the parts to be painted.... gas tank layout is most complex...
(please note in the picture of the front view The upper edge of the tunnel! This is original brand new!
Measuring for the lines is kind of challenging if you don’t have any equal reference points left and right)
 

Attachments

  • 55F9D94A-1098-439A-8C15-34B06AC40513.webp
    55F9D94A-1098-439A-8C15-34B06AC40513.webp
    74 KB · Views: 8
  • 6CE01446-0A3B-454C-9667-1B8C9D8E13F9.webp
    6CE01446-0A3B-454C-9667-1B8C9D8E13F9.webp
    67.5 KB · Views: 6
  • 9A4CD88E-B8CC-40C6-949E-6C00A7D95E68.webp
    9A4CD88E-B8CC-40C6-949E-6C00A7D95E68.webp
    47.2 KB · Views: 8
  • 777BC9C5-0993-4C85-A6CB-F349865EC5DF.webp
    777BC9C5-0993-4C85-A6CB-F349865EC5DF.webp
    27.9 KB · Views: 8
Last edited:
The original stripes on the tank are stickers with clearcoat on top and have to be removed... 😖
Also the gas thing doesn’t really have a low point! Once “everything” is drained I was left with half a pint or so, I removed the paper towels..
 
Last edited:
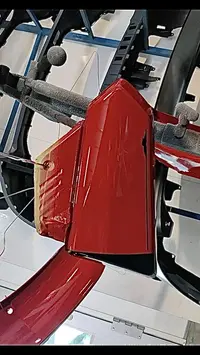
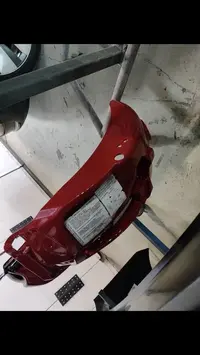
Rear fender is getting color too!!
Small eagle on side covers ..
Front fender extension in black

59E52BEA-6FC5-446C-AFFC-A32C54CD3DCD.webp
 

Attachments

  • 061DE90A-BFAB-4791-B26B-ED4F43968D0E.webp
    061DE90A-BFAB-4791-B26B-ED4F43968D0E.webp
    29.8 KB · Views: 13
  • 7B88153A-6018-4164-9033-67A25C16B627.webp
    7B88153A-6018-4164-9033-67A25C16B627.webp
    69.7 KB · Views: 13
  • 257EE771-46D6-4B4F-8E2C-9D4F963047CE.webp
    257EE771-46D6-4B4F-8E2C-9D4F963047CE.webp
    34.9 KB · Views: 12
After extended drying period...
The original Guzzi gas tank emblems... cutting off the 2 studs in the back, creating the “box” where it will be living... the emblem has to be bend to follow the gas tank...
Bend with a twist... took one hour a side to lay down correctly... PITA!B35EDEDC-3A08-4985-BFD9-576158A49C78.jpeg
 
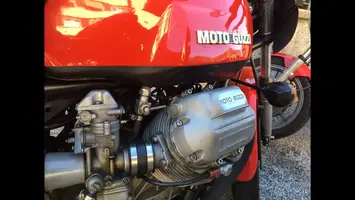
When I was in Mandello for the 💯 year anniversary, I knew that I am going to do this project and I made a lot of pic of different LM1 of this area... The gas tank on the V7 has a crown, not the flat top, it isn’t as long, and do you have to make adjustments of the position of lines
to get a longer looking effect.


557A2033-2805-4F26-B966-8FC420D99639.jpeg
 

Attachments

  • BF1946EE-1BF7-4B40-936D-A8F73CEDB0A9.webp
    BF1946EE-1BF7-4B40-936D-A8F73CEDB0A9.webp
    45 KB · Views: 10
Last edited:
Painted the front black to have more the shape of the classic LM1
Due to the lock and this is really the only flat spot on the side cover that works for the emblem... black stripe merges to become the Guzzi eagle of the LM1 area...
BAC17AC2-CF1F-46FD-81E9-EDCCA3626B7D.jpeg
 
Last edited:
The wheelbase of the 1976 LM 1 is 1470mm and the 2022 V7 has 1463mm... 7mm difference..
but if you look at the bikes the V7 looks short... stubby.. compared to the LM
One of the main reasons is the black rear fender... beautiful blue front fender, gas tank, side cover.... the end...
Second reason the tall gas tank...
Third... a lot of black (engine trans) nothing to see here...
7D85698A-354C-47F0-81D7-866E4FC24DE4.png7DAA6F26-6B25-473E-ABD2-3E60989F7EDF.jpeg
 
Last edited:
Gas tank is already off.. making a fiberglass part for the seat to extend up the gas tank like the LM had. Plan is to have a 2 part seat with this extension attached to the tank and the bench sliding into it.
The original design was a one piece but the pan broke most times where it goes up..... D7F30FA2-5A55-450F-B53D-FEC02F399CD2.webp
 
I added about 1/8 inch to the gas tank with tape to allow for the vinyl when the fiberglass is getting covered. Tank bolt will hold it in place and bench secures it firmly.
Part the foamed and sculptured.
591EE69E-1FD8-4E65-8B38-EB92791C5F6F.jpeg24A96EE3-1549-4698-A281-0FF877933464.jpegAC4A235A-AAB1-4D0A-B404-9955B56642D6.jpeg4B3F475B-1A6D-4386-A788-7024D73BAC10.webp
 
Last edited:
Next is the rear light / fender
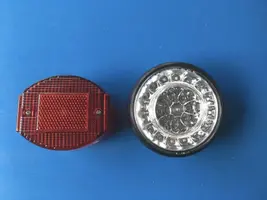
The original tail light is unbelievably heavy!!! Holy $...!
Little modifications and the LM1 first Gen light fits perfectly !
Loosing the license plate light and move the plate up as well...

BF69BD7F-4604-4967-9855-D6828C25B390.jpeg163AB5F8-0732-480A-9BC1-AE72E1807BF2.webp
 

Attachments

  • 0591C39E-F354-4B11-A8D4-7DF3C5FA9A7D.webp
    0591C39E-F354-4B11-A8D4-7DF3C5FA9A7D.webp
    74.4 KB · Views: 4
Last edited:
The filler threads on the gas tank are the same as Harley Davidson Sportster... I found an aluminum cap I liked, not vented... there are some gas caps that are 3/16” to long and bottom out (nothing a sander can’t fix) but the majority did fit including locking caps...
I just didn’t like the cheap plastic look
ABFEAAFD-6E12-4905-8EBA-98B183248B24.webp87F8E620-3340-44AE-AA3A-CC3E419C6E30.webp
 
While tank and side covers are removed it’s prime time at Todd’s place to install GTM SAS cover plates (super easy without tank)
& removal of the charcoal canister & removal/plugging/ leaving open the appropriate hoses.
 
Also note the dust covers on the fork tubes… original MG part for 40mm fork tubes! At this point in time it was very very cold outside and I had to wait for a little bit warmer weather to put them on all the way
 
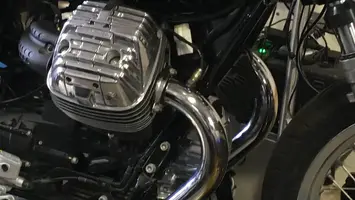
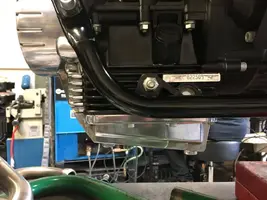
Next pieces on the list to get polished are the front engine cover, engine sump, rear swingarm, and final drive...
 

Attachments

  • 9A2813B1-3C0A-4182-B15F-56DE115208ED.webp
    9A2813B1-3C0A-4182-B15F-56DE115208ED.webp
    75 KB · Views: 15
Back
Top