• Ciao Guest - You’ve landed at the ultimate Guzzi site. NEW FORUM REGISTRATIONS REQUIRE EMAIL ACTIVATION - CHECK YOUR SPAM FOLDER - Use the CONTACT above if you need help. New to the forum? For all new members, we require ONE post in the Introductions section at the bottom, in order to post in most of the other sections. ALWAYS TRY A SEARCH BEFORE STARTING A NEW TOPIC - Most questions you may have, have likely been already answered. DON'T BE A DRIVE-BY POSTER: As a common courtesy, check back in and reply within 24 hours, or your post will be deleted. Note there's decades of heavily experienced Guzzi professionals on this site, all whom happily give endless amounts of their VALUABLE time for free; BE COURTEOUS AND RESPECTFUL!
  • Be sure to see the GTM STORE link also above for our 700+ product inventory, including OEM parts and many of our 100% Made-in-SoCal-USA GTM products and engine kits. In SoCal? Click the SERVICE tab above for the best in service, tires, tuning and installation of our products or custom work, and don't miss our GT MotoCycles® (not) art on the BUILDS tab above. WE'RE HERE ONLINE ONLY - NO PHONE CALLS MADE OR RECEIVED - DO NOT EMAIL AND ASK QUESTIONS OR ASK TO CALL YOU.
  • There is ZERO tolerance on personal attacks and ANY HYPERLINKS to PRODUCT(S) or other competing website(s), including personal pages, social media or other Forums. This ALSO INCLUDES ECU DIAGnostic software, questions and mapping. We work very hard to offer commercially supported products and to keep info relevant here. First offense is a note, second is a warning, third time will get you banned from the site. We don't have the time to chase repeat (and ignorant) offenders. This is NOT a social media platform; It's an ad-free, privately funded website, in small help with user donations. Be sure to see the GTM STORE link above; ALL product purchases help support the site, or you can upgrade your Forum profile or DONATE via the link above.

850-T Project build

Separate ground wire may be the best. Extra grounds never hurt. Attaching ground wires from where the engine and gearbox bolt up provides an excellent ground point. A;so instead of grinding, I have used star washers which bite through coatings to provide a ground.

lossless-page1-100px-External_tooth_lock_washer.tif.png
 
Yes, just ran a separate ground wire. running light and brake light work fine now.
chopped rear brake lever going on today for another test ride.
 
BTW, if anyone is wondering, I requested that this thread be moved to the custom builds forum section....
 
Also haven't been watching, and just remembered to change my email address here to something current. Bike looks great.

On subject of grounds, I've never been a fan of using the frame as electrical return, especially for the stuff on the front end. Have run a 14 gauge ground wire out to the junction in the headlight shell on both bikes. Seems like a bad idea to force current through the headset bearings, and 3 feet of wire is so cheap.
Enjoy that beast!
 
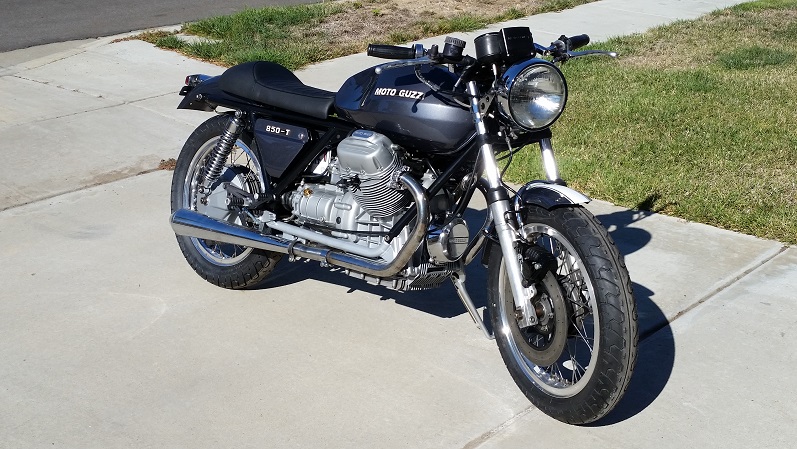
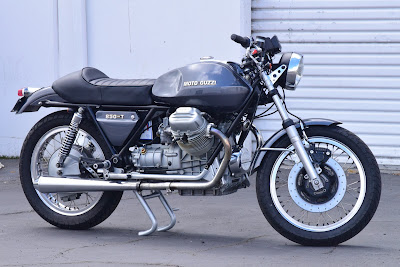
So the project is now off the stand, supported by its own two wheels, and has seen the light of day for the first time in 5 or so months. There are a few things still on the list, but I've done a short test ride around the block.
quarter.jpg

after%2Btop.jpg
after%2Bside.jpg
Looks nice except for one MAJOR thing. You can't ride it around with the mufflers sloping down like that, it looks atrocious.
Ciao
 
I'm new is there a better place to find out about eldo 850 than here? Different page? I need new cylinders to replace the chrome barrels, nothing new!!!
 
Fine looking bike ,good job . I quite liked the original look be perfect for bad weather riding for the uk
 
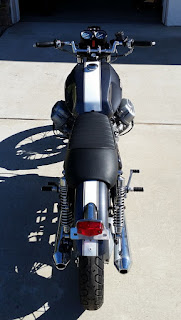
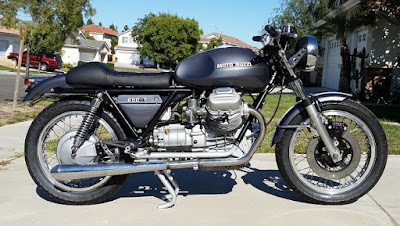
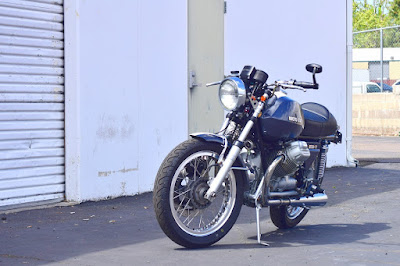
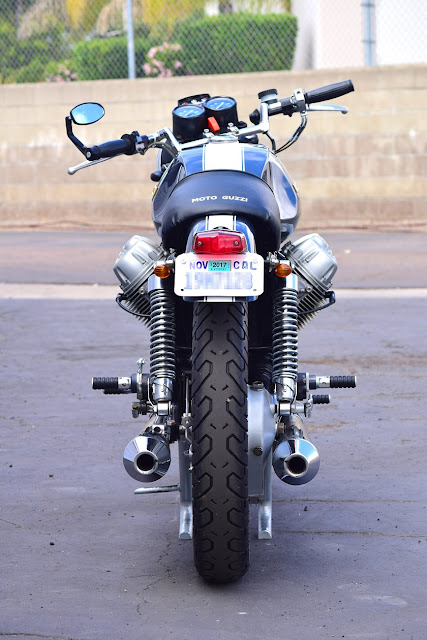
Update: I noticed that it had been almost a year since my last post on this project. While it was 98% done at the time, I'd still been chasing a few items since then to ensure a 'no excuses' fit, finish and rideability to both daily living standards and my project specs. And had yet to take some decent photos at that time.

Finished during the last months of 2016 were:
  • fabricated and welded shift lever bracket
  • shortened stock brake lever (tossed the Tarozzi lever)
  • modified seat pan and foam; sewed a new seat cover from scratch (including logo lettering)
  • fitted longer progressive springs up front
  • fitted smaller 12mm m/c to improve stock braking
  • lighter throttle/carb springs to ease 'gorilla grip'
  • replaced flaking cylinder & piston
  • chased and "rectified" a charging issue (faulty r/r)
  • added a bar-end mirror and discreet turn signals (all of which actually work quite well!)

I have put several hundred miles on it; starts quickly and settles to a stable idle; shifts, accelerates and stops without drama and gives me confidence that I will get where I'm going and back without trouble. Headers might still get a coat of flat black, but nothing is actually on the required list any more. Except to ride and enjoy.
shoot_leftside%2Bb.jpg

2017-04-06_05-09-26.jpg

shoot_frntquarter.jpg

shoot_rear%2Bb.jpg
 
Appreciate the feedback.
Yes, was happy that Robert who painted it was able to finish the tank so well. I repainted both badges myself, however, and that was a lot of slow work - literally under a magnifying glass.

They are still the stock headers. They came wrapped by PO, and unfortunately this meant lots of surface pitting and rust left behind. I scrubbed with Marvel Mystery oil and tinfoil and got most of the pitting. Then used some Blue Magic polish to bring a bit of shine out. Same with the exhausts (which came out fantastic, actually). Up close the headers don't look that great, but they are serviceable and I was hoping to avoid the cost of replacement. My original plan was to paint them flat black - but not an urgent need and may leave as is.
 
Back
Top