Here's the Zumo mounting kit I got from GadgetGuy--
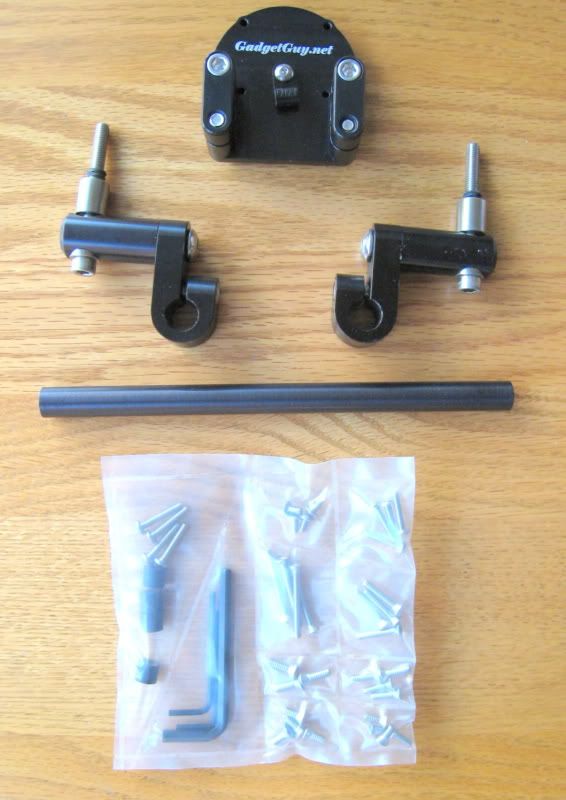
This is very nice stuff. All hard anodized and expertly crafted. I just got this Norge a week ago and this was my first farkle. Happy it came out well.
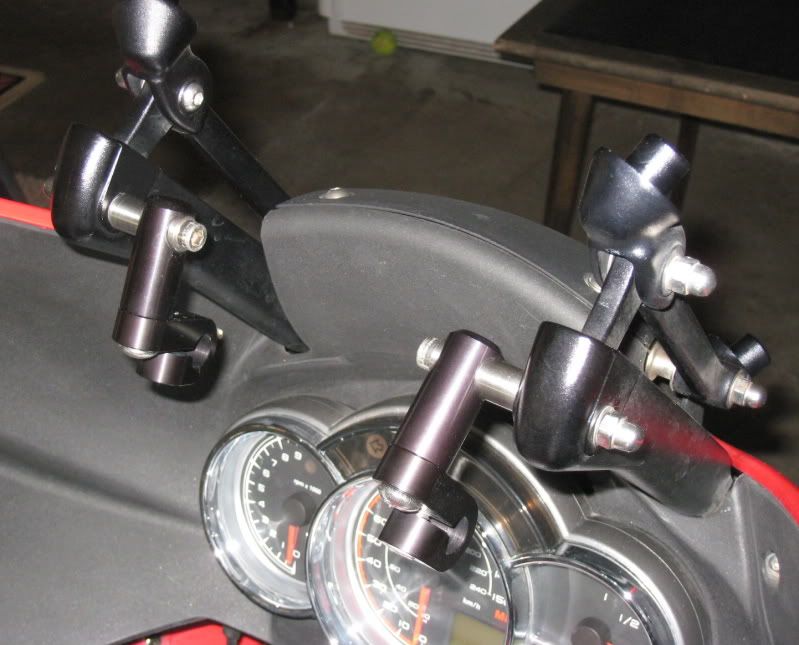
First step is to remove the windshield then install the swivel joints into the upper bolt holes on the Norge windshield brackets--
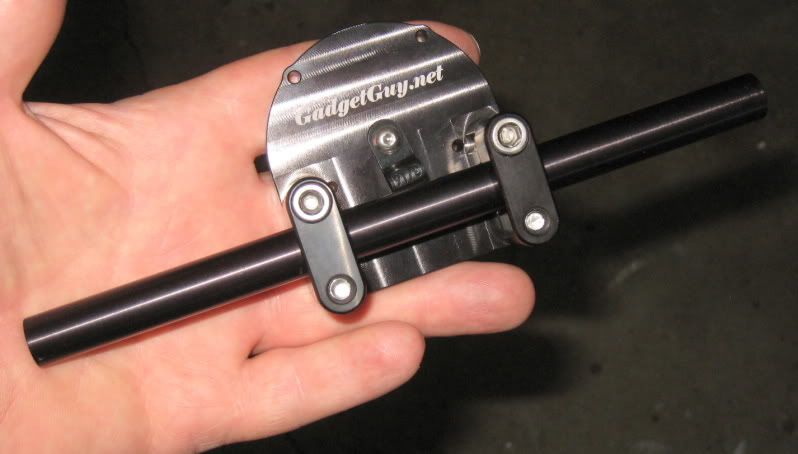
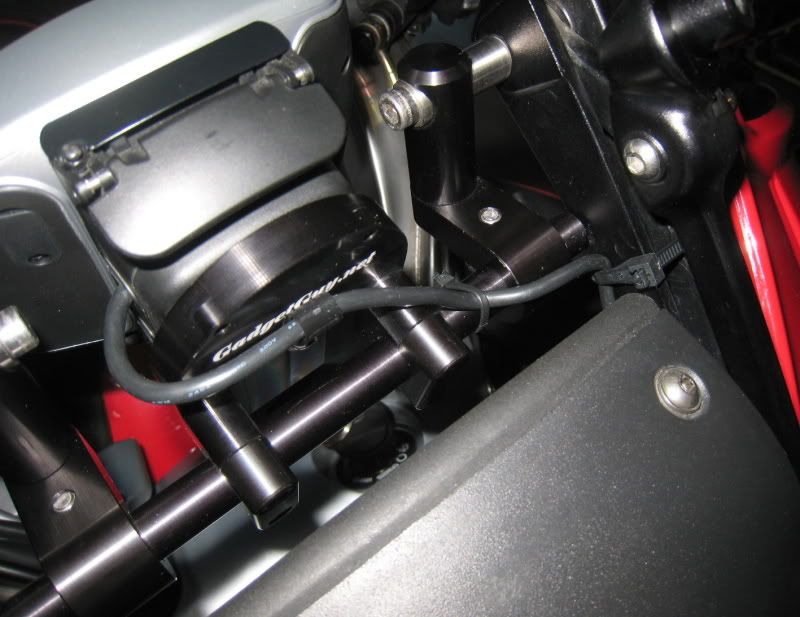
Next, slide the crossbar into the base plate--
Then slide the crossbar assembly into the swivel joints--

At this point, it's a good idea to figure out where exactly you want the Zumo mounted. With the swivel joints and the crossbar, you have quite a few options. When you think you got it, tighten up the assembly. But not too much because I guarantee you'll be fiddling around with the location some more.
Attach the Zumo cradle to the base plate. The base plate is already drilled and tapped. The right-size bolts are included with the GadgetGuy kit.
Decide where you're going to run your power cord. (Note the nice strain relief fitting on the back of the base plate.)
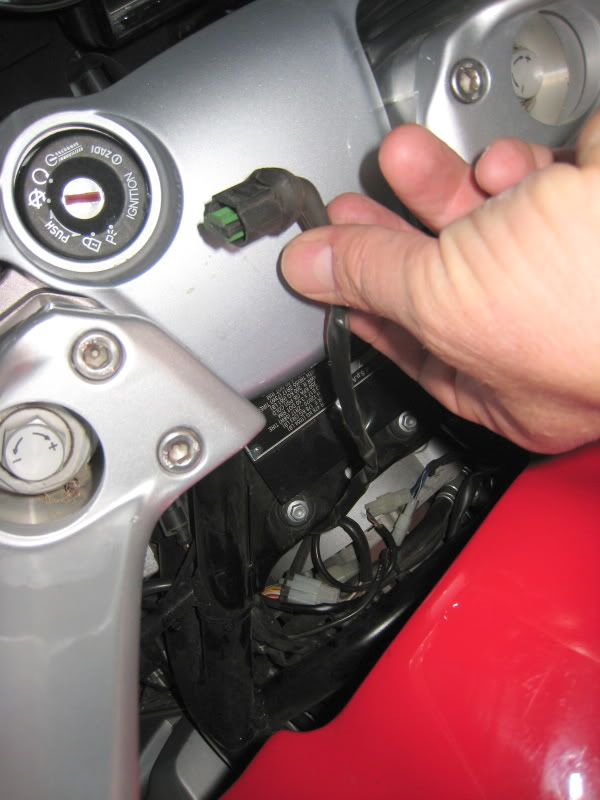
I secured the power cord to the left windshield bracket and ran the cord down behind the instrument panel.
At this point, you have to remove the three bolts that hold the gas tank in place, then move the gas tank rearwards about 6 inches. I was dreading this part of the install but was quite surprised to discover that this step was easy! No surprises at all!
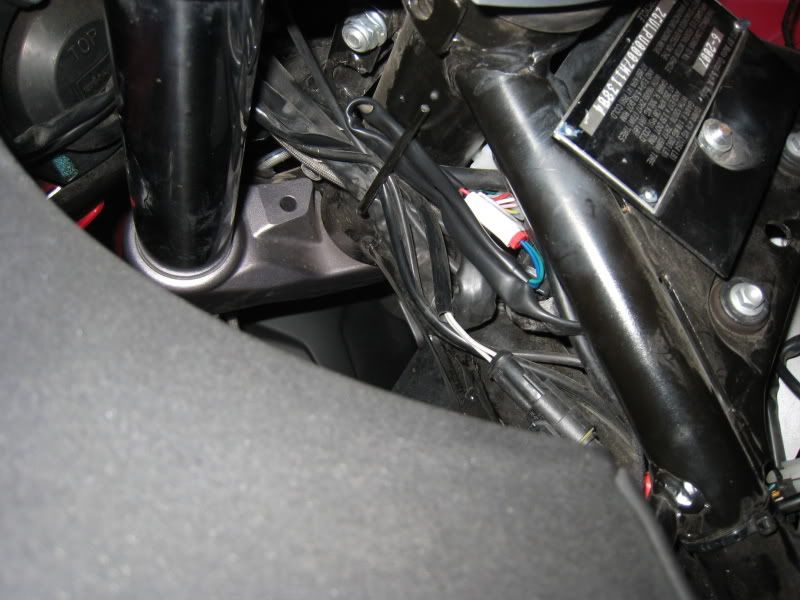
Once the gas tank is out of the way, it's easy to reach the OEM connector for the TomTom GPS. There's a cable tie holding it to the frame right where the front of the gas tank was.
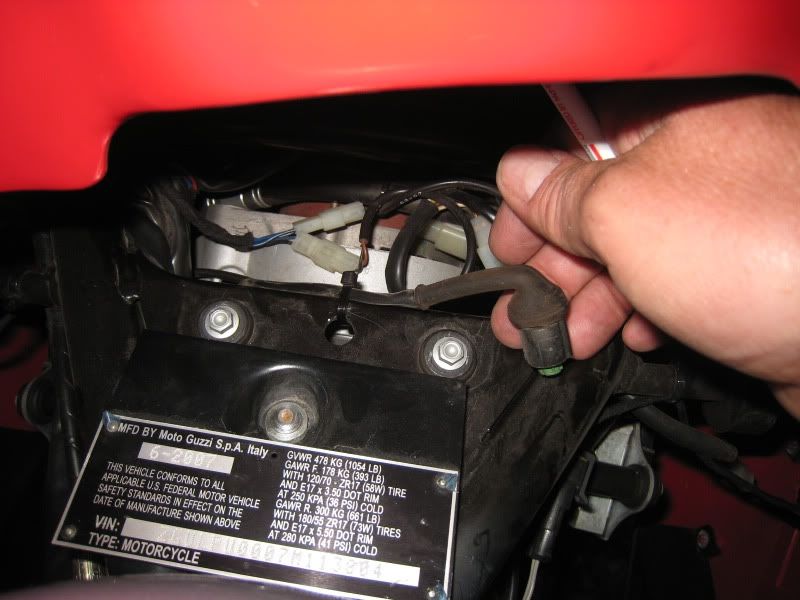
Clip off the cable tie, stretch out the TomTom power cord, then cut off the connector.
Locate the Zumo power cord and figure out the rest of your routing. Once the wires are in place, make your connections. Note that for the TomTom connection, blue is ground and green is power. For the Zumo you have your standard black ground and red power. The size small Posi-Locks are an easy way to go--
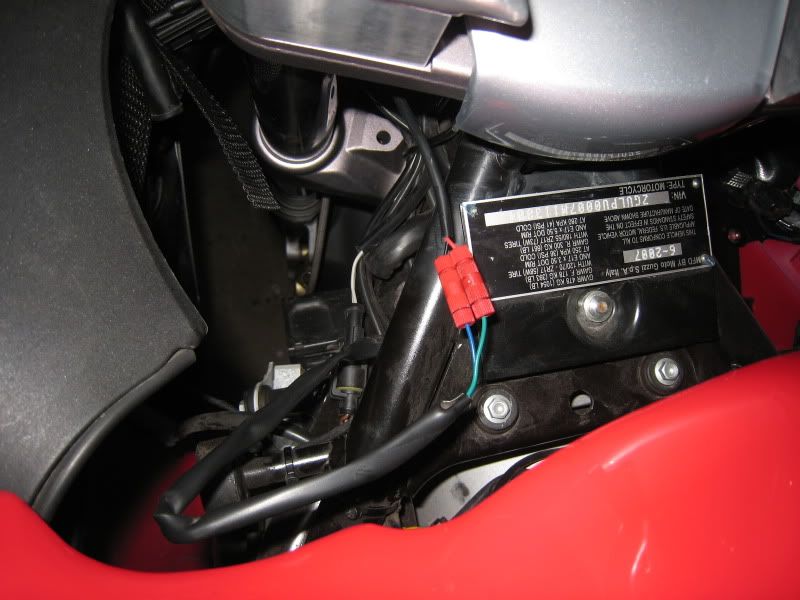
The steering post has a handy spring clip for holding wires. I had about 8-10" of extra wiring so I folded it over and tucked it in. Note that I wrapped my two Posi's with white electrical tape. Not necessary, but I'm a belt and suspenders-type guy.
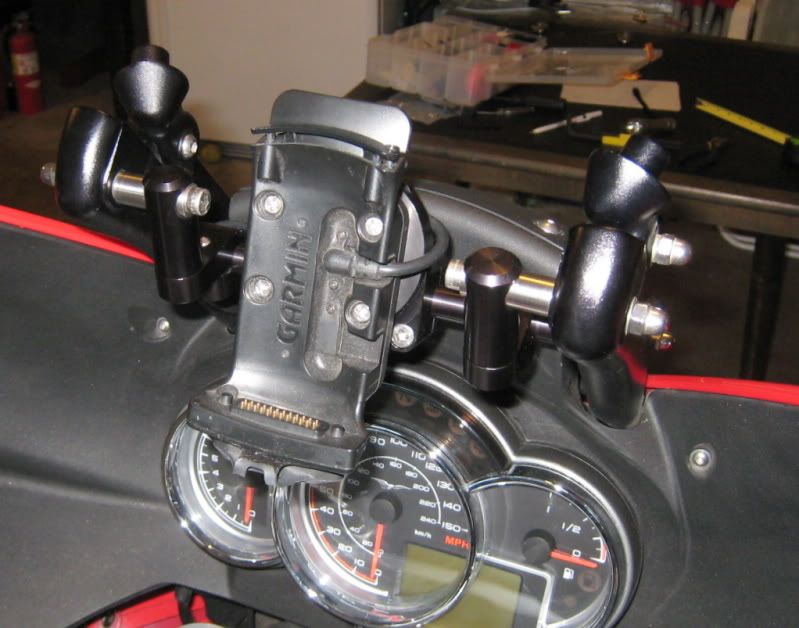
Then put the gas tank back, re-install the windshield, and attach the Zumo. Then, if you're anything like me, fiddle with it for an hour until you get the position just where you want it. The result--
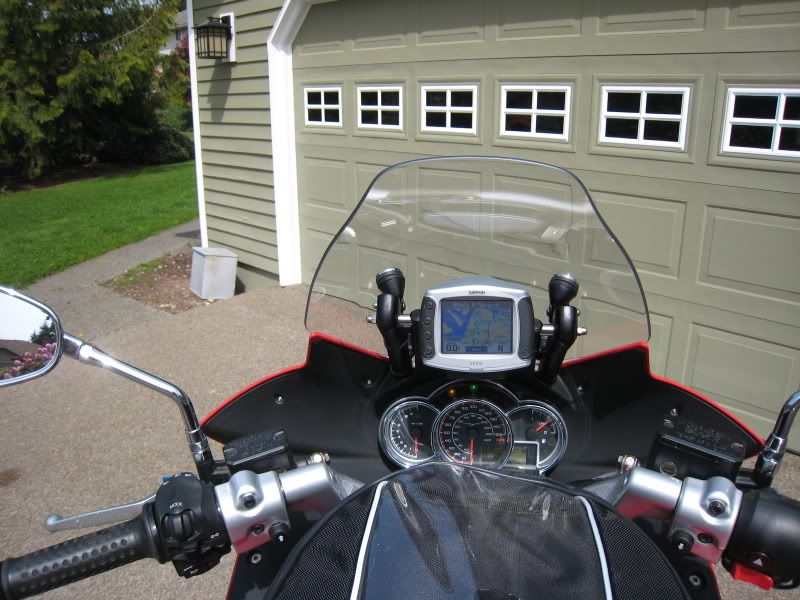


A nice clean install. Switched power without the complexity of a fuse panel or a relay. Fairly easy to do. Solid mount but easy to adjust. No dangling or exposed wires. Easy to reach the buttons. Gauges and idiot lights all still visible. Windscreen unaffected. Zumo protected from wind and rain. Nice!
This is very nice stuff. All hard anodized and expertly crafted. I just got this Norge a week ago and this was my first farkle. Happy it came out well.
First step is to remove the windshield then install the swivel joints into the upper bolt holes on the Norge windshield brackets--
Next, slide the crossbar into the base plate--
Then slide the crossbar assembly into the swivel joints--
At this point, it's a good idea to figure out where exactly you want the Zumo mounted. With the swivel joints and the crossbar, you have quite a few options. When you think you got it, tighten up the assembly. But not too much because I guarantee you'll be fiddling around with the location some more.
Attach the Zumo cradle to the base plate. The base plate is already drilled and tapped. The right-size bolts are included with the GadgetGuy kit.
Decide where you're going to run your power cord. (Note the nice strain relief fitting on the back of the base plate.)
I secured the power cord to the left windshield bracket and ran the cord down behind the instrument panel.
At this point, you have to remove the three bolts that hold the gas tank in place, then move the gas tank rearwards about 6 inches. I was dreading this part of the install but was quite surprised to discover that this step was easy! No surprises at all!
Once the gas tank is out of the way, it's easy to reach the OEM connector for the TomTom GPS. There's a cable tie holding it to the frame right where the front of the gas tank was.
Clip off the cable tie, stretch out the TomTom power cord, then cut off the connector.
Locate the Zumo power cord and figure out the rest of your routing. Once the wires are in place, make your connections. Note that for the TomTom connection, blue is ground and green is power. For the Zumo you have your standard black ground and red power. The size small Posi-Locks are an easy way to go--
The steering post has a handy spring clip for holding wires. I had about 8-10" of extra wiring so I folded it over and tucked it in. Note that I wrapped my two Posi's with white electrical tape. Not necessary, but I'm a belt and suspenders-type guy.
Then put the gas tank back, re-install the windshield, and attach the Zumo. Then, if you're anything like me, fiddle with it for an hour until you get the position just where you want it. The result--
A nice clean install. Switched power without the complexity of a fuse panel or a relay. Fairly easy to do. Solid mount but easy to adjust. No dangling or exposed wires. Easy to reach the buttons. Gauges and idiot lights all still visible. Windscreen unaffected. Zumo protected from wind and rain. Nice!


