• NOTICE: Starting March 24th, we've shifted to a mandatory user Account upgrade (donation) to post here. Once you've created an account, see the SITE SUPPORT section at the bottom on how to upgrade. This is to help try and cover site costs, and reduce redundant and argumentative posts. Small $ donations via our link above will not be considered. We still require ONE post in the Intro section (bottom of the main Forum section list) to introduce yourself: NO QUESTIONS THERE - THEY WILL BE DELETED; Search and read first before staring a new thread, most topics are WELL covered here. Also to NOTE, the owner of this website lost his home in the L.A. Wildfire storm in January; See the USA section for more details. Your consideration and understanding on use of this site is expected. It's NOT a free social media platform - decades of time and personal money are invested. We have a zero tolerance policy on attacks. Do NOT write us direct and ask questions unrelated to the Forum, we do not offer Tech support direct, they will be deleted.

Norge Tupperwareand Tabs, helpful info:

Concur on the weirdness of the multiple different size/type screws to hold a panel on. I have several other bikes and none of them require as many different fasteners to do the same sort of job.

Like you, I’m planning to replace some fasteners to reduce the # of different sized wrenches/sockets I need to remove panels for routine maintenance access.

Don’t get me started on BMWs weirdness in their attempt to be different just to be. Based on my experience with an R1150GS, I’m staying far away from BMWs.

The only one I like is the R1100/1150/1200S anyway. Even then, only the styling.
 
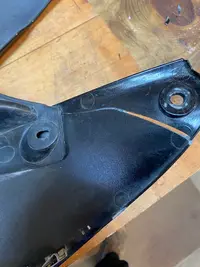
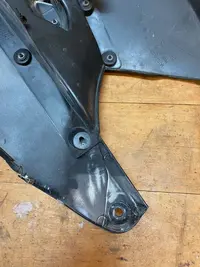
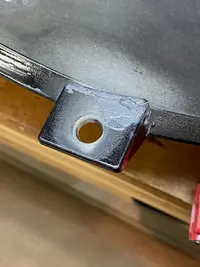
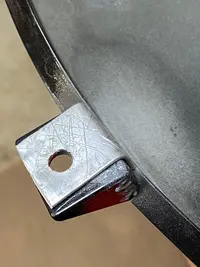
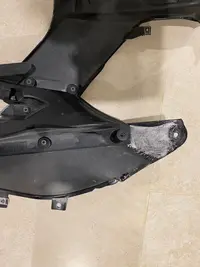
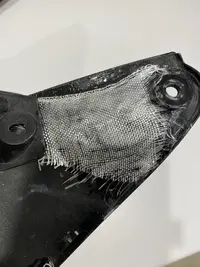
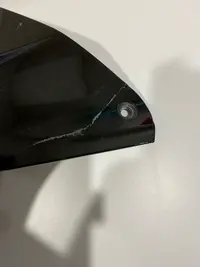
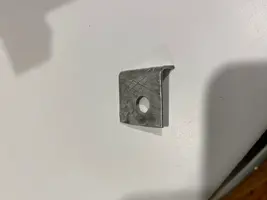
A quick update to this discussion with pics showing the use of Shoe Goo and fibreglass cloth to repair the cracked N8V site panel and JB Weld with aluminum backing support to repair broken tabs. The SG with cloth was great on the back of the panel not not suitable for sanding or painting. Hence a thin bead of JBW in the crack, applied from the back before the application of SG and cloth. All seem really firm now yet with a bit of flex that you would not have with fibreglass resin. or straight JBW.
 

Attachments

  • N8V Panel repair - 1.webp
    N8V Panel repair - 1.webp
    102.1 KB · Views: 6
  • N8V Panel repair - 2.webp
    N8V Panel repair - 2.webp
    133.7 KB · Views: 6
  • N8V Panel repair - 3.webp
    N8V Panel repair - 3.webp
    84.2 KB · Views: 6
  • N8V Panel repair - 4.webp
    N8V Panel repair - 4.webp
    91.1 KB · Views: 4
  • N8V Panel repair - 5.webp
    N8V Panel repair - 5.webp
    103 KB · Views: 4
  • N8V Panel repair - 6.webp
    N8V Panel repair - 6.webp
    96.6 KB · Views: 4
  • N8V Panel repair - 7.webp
    N8V Panel repair - 7.webp
    42.6 KB · Views: 4
  • N8V Panel repair - 8.webp
    N8V Panel repair - 8.webp
    56.3 KB · Views: 5
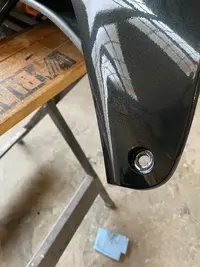
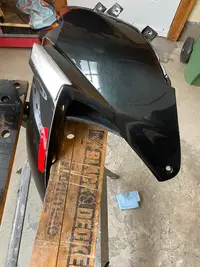
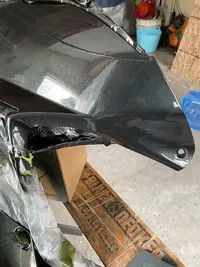
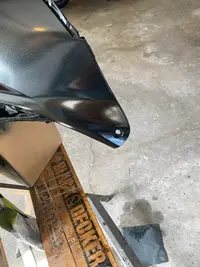
A quick update on the N8V Tupperware repair. After shoe goo and fibreglass cloth on the back, JB weld on the front to fill and smooth the break, I masked off the bottom of the panel, sanded and prepped the top. Primed and used GM black metallic and finally used spray Max 2k clear Glamour as a top coat. You can’t tell the difference from the Norge original black finish. I just have to buff out the match tape line. Makes me wish I had done the whole panel. The match line is along the bottom of the Norge badge.
 

Attachments

  • IMG_5444.webp
    IMG_5444.webp
    51 KB · Views: 4
  • IMG_5443.webp
    IMG_5443.webp
    77.2 KB · Views: 4
  • IMG_5439.webp
    IMG_5439.webp
    81 KB · Views: 4
  • IMG_5438.webp
    IMG_5438.webp
    55.4 KB · Views: 4
Back
Top