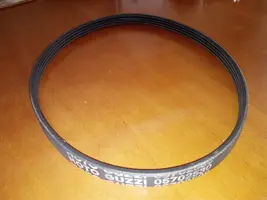
I just replaced my belt. John L mentioned in post #15 in this thread that his mechanic did his without removing the cover from the bike. I can confirm this can be done, as that's how I did mine. I didn't use cable ties on the cover, just left it there and managed to fish the belts in and out from the right side of the bike. It took me between 6 and 7 hours, in 3 sessions, over 2 days. Biggest problem was the Allen head adjustment bolt (the one that threads into a boss on the alternator) rounded out when trying to loosen it. That's how my first session ended. The second session was this morning, which was the removal of the rounded bolt. I managed to grab it with a medium set of vise-grip pliers, and broke it loose. After a trip to my local Home Depot (amazing, they had an exact replacement in stock), I did the final session and completed the job.
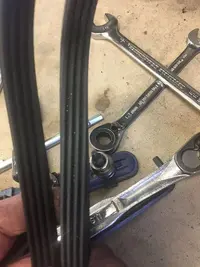
My bike had 31000 miles on it, and the maintenance schedule is probably about spot on in recommending replacement at this point. A small chunk of belt was missing from one of the grooves, and small cracks were visible in the entire belt.
Here's a step by step:
My bike's a 2016 Eldorado, no secondary air, hybrid throttle by wire (cables from grip to transducer under fuel tank), your procedure may be different.
1. Disconnect the battery. Remove gas cap trim plate, disconnect wires on top of tank, remove plastic fairings at front of tank, remove bolt at rear of tank, slide tank rearward and lift. I placed a 2 x 4 board under the tank to keep it off the valve covers. Other than the wires I mentioned, I left all other hoses and wires connected.
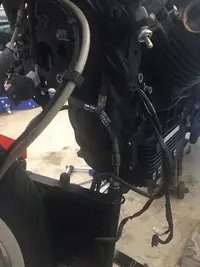
2. Remove center fairing piece (above horns), remove and disconnect horns, unbolt oil cooler, cut wire tie securing fan wire to frame, lift cooler off mounting pins and allow it to hang, no need to disconnect hoses.
3. Unbolt the throttle transducer from the frame, disconnect the left connector, and position the transducer rearward, under the fuel tank. No need to disconnect the cables or the other connector.
4. Remove and disconnect ignition coil, left side, in front of cylinder. Wire-tie securing primary wires to coil bracket will need to be cut.
5. A somewhat triangular shaped plastic doohickey (my best term to describe it) on the right side of the frame, in front of the cylinder, needs to be removed. This piece has wiring and a brake hose wire-tied to it. Cut the wire-ties (I think there were 6 altogether), remove the Allen head button-head bolts, and muscle the plastic piece out of the frame. It's flexible enough to carefully pull out without damaging it. I recommend using wire-ties on the 4 sets of wires that are secured to the top of this plastic part, before cutting the original 4 wire-ties, to keep them grouped as original, for reassembly. I used a long wire-tie from around the handlebar to hold this mess of wiring up out of the way, to make access easier. At this point, you should be able to see the boss on the alternator, in which the bolt that I rounded out threads into. Spray this boss with penetrating lube. Using a long punch or bar, give the boss a few good whacks with a heavy hammer. It probably would be a good idea to let it sit overnight at this point, to allow the penetrant to work it's way in, and give it a few more whacks the next day.
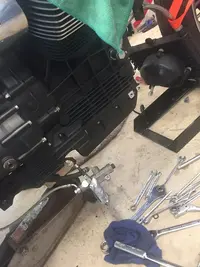
6. Use a jack with a small board to jack up the engine slightly, under the oil pan. Remove the silent block mount on the front of the engine, 6 bolts, 2 pieces. Note how the rubber mount is positioned on the engine, for reassembly.
7.There is a connecting rod which goes from the upper part of the frame to the bracket on the front of the engine. Remove the Allen head bolt that secures the lower end of the connecting rod to the metal bracket on the front of the engine. From the top side, in front of the fuel tank, you need to remove the Allen-head bolt securing the upper part of the connecting rod to the frame. I used a flex-head, 3/8" drive ratchet with a 10mm Allen socket to do this. After you remove the bolt, you need to remove a metal sleeve that goes through the bearings in the connecting rod. Once you remove the sleeve, the connecting rod will drop, so be sure you have a hold of it when doing this. I had to move the connecting rod around for a bit to jar the sleeve loose for removal.
8. Remove metal mount bracket form engine. 4 bolts, bracket will just be repositioned upward out of your way during the rest of the procedure, can't be removed from bike without major disassembly.
9. Remove 6 Allen-head bolts securing belt cover to engine. You'll have to move the mount bracket (removed in step 8) around to access all of the bolts. Remove the rubber plug with the Guzzi logo from the belt cover.
10. Loosen the locknut and adjuster screw on the right side of the engine. Loosen the adjuster screw that's behind the cover. You'll have to shift the belt cover off to the left as far as you can to access this bolt.
11. On the left side, loosen the alternator mounting bolt and nut. The nut is a 15 mm, can easily be accessed with a box/open end wrench from the left side. I inserted an 8mm Allen socket into the bolt head by pulling the belt cover back slightly, and held it with my fingers while using the wrench to loosen the nut. Be careful not to drop the Allen socket inside the cover, could be rather difficult to remove.
12. The belt should now be loose. Working from the right side, remove the belt from the alternator pulley, using a hooked tool (commonly used to remove cotter pins and stubborn radiator hoses), pull the belt from the pulley and out the right side of the housing. Pushing the belt downward, use your finger through the hole in front of the cover to work the belt off the lower pulley and up around the shaft, between the inside of the cover. Pull the belt out from the upper right of the cover. Using a flashlight, inspect for debris on the pulleys through the gap behind the cover. Turn both pulleys (top with your finger, bottom with a socket and ratchet) for a complete inspection. I had to use a small flat blade screwdriver to clean the lower pulley.
13. Install the new belt through the right upper side, push it downward, use your finger through the hole to work it onto the lower pulley, use the hook tool to place it on the alternator pulley. Be sure to inspect with a flashlight for proper belt positioning on the pulleys. Run the outer adjustment bolt in until you can get between 1/4" and 1/2" of belt deflection, using moderate finger pressure. Tighten alternator mounting bolt/nut and remaining adjuster bolt. Turn the crankshaft using a socket and ratchet until the belt makes at least two full revolutions. Reinspect for proper belt/pulley alignment, check tension, readjust if necessary, rotate crankshaft, recheck.
Reverse all of the steps to complete the job. I used anti-seize compound on the upper connecting rod bolt and sleeve, as well as the adjuster bolt that I rounded out, in hopes of making future repairs easier. The belt adjustment procedure isn't exact, but should be fairly close to proper tension. Should you have a whining noise afterward, you'd probably better take it back apart and loosen the tension.
Hopefully, I didn't miss any steps in this post. It's a long procedure just to change a belt, but it can be done without removing the exhaust, disconnecting lines and having fluid pouring out, or removing the lower frame assembly. Just make sure to keep all bolts organized, take your time doing the work, and you should be successful.


