Ciao Guest - You’ve landed at the ultimate Guzzi site. NEW FORUM REGISTRATIONS REQUIRE EMAIL ACTIVATION - CHECK YOUR SPAM FOLDER - Use the CONTACT above if you need help. New to the forum? For all new members, we require ONE post in the Introductions section at the bottom, in order to post in most of the other sections. ALWAYS TRY A SEARCH BEFORE STARTING A NEW TOPIC - Most questions you may have, have likely been already answered. DON'T BE A DRIVE-BY POSTER: As a common courtesy, check back in and reply within 24 hours, or your post will be deleted. Note there's decades of heavily experienced Guzzi professionals on this site, all whom happily give endless amounts of their VALUABLE time for free; BE COURTEOUS AND RESPECTFUL!
Be sure to see the GTM STORE link also above for our 700+ product inventory, including OEM parts and many of our 100% Made-in-SoCal-USA GTM products and engine kits. In SoCal? Click the SERVICE tab above for the best in service, tires, tuning and installation of our products or custom work, and don't miss our GT MotoCycles® (not) art on the BUILDS tab above. WE'RE HERE ONLINE ONLY - NO PHONE CALLS MADE OR RECEIVED - DO NOT EMAIL AND ASK QUESTIONS OR ASK TO CALL YOU.
There is ZERO tolerance on personal attacks and ANY HYPERLINKS to PRODUCT(S) or other competing website(s), including personal pages, social media or other Forums. This ALSO INCLUDES ECU DIAGnostic software, questions and mapping. We work very hard to offer commercially supported products and to keep info relevant here. First offense is a note, second is a warning, third time will get you banned from the site. We don't have the time to chase repeat (and ignorant) offenders. This is NOT a social media platform; It's an ad-free, privately funded website, in small help with user donations. Be sure to see the GTM STORE link above; ALL product purchases help support the site, or you can upgrade your Forum profile or DONATE via the link above.
Thank you sir! I wouldn't call myself skilled, since I am a stick welding (used stainless rods) using youtube as my teacher. But the welds themselves are pretty solid.
Angle grinders and flap discs are making me look way better than I really am.
I think that the Romanian synonim for Bee's Knees or Cat's Pajamas is Tit of a Cat (Tzâtzã de mâtzã) - roughly translated.
I'd wish! I usually cut it with the angle grinder. There is a laser shop at 20 min drive but it is pretty expensive. The blanks were cut there for about 50 US dollars, but they were heavily modified because the shape of the hangers is a pretty weird one and my design was not that precise.
So, after I had them cut, I've splitted them with my angle grinder and ground some parts to achieve some weird angles to be spot on.
Ah !
I also use an angle grinder, doesn’t do a very clean job.
Its been ok for the license plate mounting brackets, but not for a finished piece like that !
(at least not in my hands )
Ah !
I also use an angle grinder, doesn’t do a very clean job.
Its been ok for the license plate mounting brackets, but not for a finished piece like that !
(at least not in my hands )
Sometimes, function must be above form. In this case, by removing the grab-rail I was having a hard time lifting the bike on the center stand. I could do it without it, but it was so much harder than having the grab rail. Therefore...something must be done.
I've came up with this idea...not fully convinced about the design but it is not finished yet...so there might be some slight changes.
Had some scrap stainless around and made this 1/3rd of a grab bar.
Had some hex bar and turned it to be round and imitate the standard design of the grab rail bung. The problem was that the diameter was not large enough, so I had to improvise for the flanged part.
Now it looks like this. I tried to follow the lines of the seat somehow but depends the angle you are looking at it. The position will be slightly different since it needs a second bracket that bolts under the seat to the frame.
At least I have a nice grip / hand position.
And this is the top view. More flush than it looks from the side.
If you guys have a different opinion about this, please share it.
Huh !
I wasn't sure what the heck was going on here the first time through the last post - But Now I get it.
Nice tidy option
The only thing I can think of that would be different would be to make a Flat Eyelet at the end of the bar and mount it Behind the shock ?
PS: There is nothing wrong with the way to did it - you were just Asking if we could think of anything
( don't know if pushing the shock Outboard 2 - 3 - 4mm would be an issue ? )
Well...In pictures it looks worse than it is in reality...probably I am overthinking.
I wouldn't mess with the shock mount geometry, even though I must admit this solution crossed my mind.
Buuut, let's look at the bright side. My design is a tad more beautiful than the one from Hepco & Becker
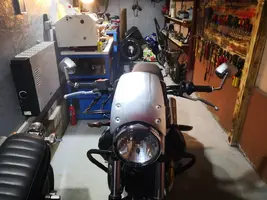
I've pushed aside the idea of using clip-on bars because of the necessity of buying new clutch / brake / throttle cables...but, I went a different route: installed the Agostini Sport Drop Bars. Ordered them from Italy, arrived in several days, installed in less than 20 minutes, everything is spot on.
Because I absolutely HATE the standard mirrors, I said to myself that something must be done. Had a look at some quality mirrors...damn, they are so pricey! Chinese mirrors usually suck pretty bad...I was kinda stuck.
While showering, an idea came to my mind: "Why don't you build your own bar end mirrors?"
Well...this was everything I needed. I've remembered that I had a pair of fully adjustable alloy mirrors, but one of the mirrors had a cracked glass.
This was the spark that fueled today's project.
Long story short, I've made some custom bar ends out of stainless steel:
...and made an internal handlebar locking system out of some wall anchors. Modified them a bit, drilled & threaded the conical part for an M6 allen head bolt.
For the mirrors stem I remembered that I had in my parts bin some handlebar mounts from a communist era motorcycle (Voskhod). 22 mm clamping diameter. Perfect for my needs.
On the left you can see the mount, on the right the mirror.
The handlebar end and the clamp / stem, look and lock together like this.
The threaded portion of the stem must be shortened a bit.
I've also created some adapters to screw over the threaded area and to match the mirror's mounting size. Still need to do some more things:
1. Add a taper on the adapter, to match the look of the stem.
2. Shorten the threaded part so the adapter will fully sit on the base.
3. Cut some new glasses for the mirrors.
4. Powder coat everything in the same nuance as the handlebars. The clamps were chromed...but they are over 50 years old and as you can see, the chrome flaked. I think they will look nice on black vs the stainless mounting hardware.
Everything used when creating these mirrors were from the scrap bin.
To get a (rough) idea about the mirrors...here are some photos. They will look much better once they will be finished.
Today had some spare time and decided to go forward with the mirrors.
Added a taper on the mirror adapters, shortened the threaded part, cleaned some marks. Pretty happy how the taper turned out and learned some new things.
Next in line is to weld the seam where the handlebar mounts and the adapter are joined, then surface them to be seamless.
...and then powedercoat it and call it done. Saved a pretty decent amount of cash and had some fun. .
I worked with a pipe line welder and he had a similar phrase “ we’ve done so much for so long with so little, we’re now qualified to do anything with nothing “
I worked with a pipe line welder and he had a similar phrase “ we’ve done so much for so long with so little, we’re now qualified to do anything with nothing “

 gtmotocycles.com


") )
)
.webp")

.webp")
.webp")
.webp")


.jpeg")


.jpeg")


.jpeg")
.jpeg")
.jpeg")
.jpeg")


.jpeg")
.jpeg")
.jpeg")

.jpeg")