Chris J. Haasbroek
Just got it firing!
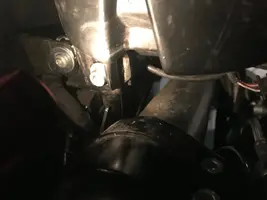
The 6 o' clock pawl is missing and the 9 o' clock pawl is hanging by a thread as it also points outward. 12 and 3 o' clock pawls still engage onto the fuel elbow. I will send some photos.
Follow along with the video below to see how to install our site as a web app on your home screen.
Note: This feature may not be available in some browsers.
Performed this procedure today on a bike a bought a couple weeks ago. Very helpful guide! Just a couple comments: There were three sets of 2 screws to remove the fairing/light assembly. 2 additional to the instructions bolting the fairing to the frame from underneath + the two behind the dash and the two on the front underside of the fairing, and, on my bike the right hand (ALF) vent line from the canister was routed to a breather connection on the air box under the battery, instead of down to the engine guard. There was a clamp on the engine by the engine guard - but no hose. The manual clearly shows this line should drain down the right side through the empty clamp. I corrected all this according to the procedure. My question is: what normally runs to this right hand 1/4in breather stub on the air Box? I plugged it since I didn't find any other open lines.
 ) and I took some pictures of a few other repairs that I made. I'll get those organized and posted soon.
 Aha!You cannot. You must remove the fairing assembly. The lights assembly bolts in place from the back side. Ok. Good Luck.
Not hard if you know how. A search would have found this. https://www.guzzitech.com/forums/threads/removing-fuel-line-quick-disconnect.20279/Hi guys, I have 2008 Norge, second time fighting with the fuel red/grey connector- successfuly.
Is any of you exchange this critical part with some other connector for easy?
Hi guys, I have 2008 Norge, second time fighting with the fuel red/grey connector- successfuly.
Is any of you exchange this critical part with some other connector for easy?
I used flat screwdriver 3mm to release the 4 little pins inside the connector gently.

 www.guzzitech.com